
Vector Search - Using RAG With Your Documentation
After going over the benefits and differences of vector search in my previous post, I’d like to go over a real world example - embedding documentation, putting it into a vector database, performing searches against the database, and responding to a question using vector search, retrieval-augmented generation, and language models.
Required services
First off, we need a vector database. A vector database is similar to a regular database in a lot of ways; they often have a concept of tables, columns, and rows. The key difference is a supported column type, Vector, which represents your embedding of the row’s content. The vector database engine often has built-in functionality for search against this column, allowing you to find the closest (or furthest) matches by vector.
You can get a vector database going by using OpenSearch (ElasticSearch’s open-source cousin), and there’s a number of hosting providers that will host a database for you (including AWS). But once you have a vector database set up, how do you get the vectors to put into it? You find an embedding model!
There’s a number of different options for generating embeddings. I’ve used Amazon’s Titan Embeddings model, but there’s a number of different approaches including Word2Vec, GloVe, BERT, GPT, and more. Each have their own pros and cons, but the key is to be consistent - the embeddings you generate with one model won’t be compatible with the embeddings from others, so you’ll want to make sure the model you use to embed your content is the same as the one you use to embed your future queries. It’s also worth noting that hosting providers will do some of this (and the subsequent) steps for you - AWS for example has a knowledgebase offering when you just feed it your raw content and it takes care of the rest, including the vector database management.
Cutting up the content
Deciding on an embedding model is just a minor step in the process however. The main unit of work in this flow is data collection and curation, as it usually is with AI projects. What we basically want is to separate our content into “snippets” of relevant data that can be referenced as needed.
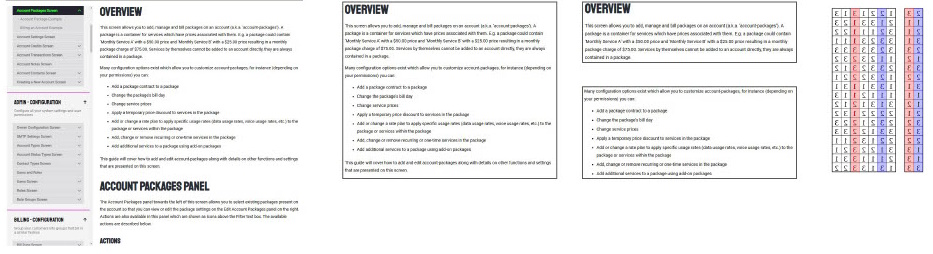
If you think of the end goal, what we’re trying to achieve is to be able to create chunks of information that we can feed into a language model to answer a question. If you were to put an entire help page for your software into ChatGPT, for example, a number of bad things could happen:
- You may get irrelevant data in your results, talking about a button or field that has nothing to do with the question
- Your document may take the entire context window of the model, causing an error or data to be omitted
- Your language model queries will be more expensive than they need to be - you pay per token that you send into the model
It’s much better to be able to only query and send in the data that’s relevant to the user’s question to avoid all these issues. To do that, we need to cut up that original document (or documents) into bite-size chunks that we can more easily embed and re-use with our RAG flow. For our internal app, we were able to divide our content by section headers, but your mileage may vary. Even with that natural sub-division we broke up larger chunks of content even further, down to about 300 words with some overlap between chunks.
Embedding and storing vectors
Once you have your chunks of content, you can start to create embeddings for them. Again, there are hosted tools to do this sort of thing, but they just automate the process of calling one of the embedding methods I mentioned above and store the result. You could easily script it, and even run the entire process locally if you have the hardware to do it.
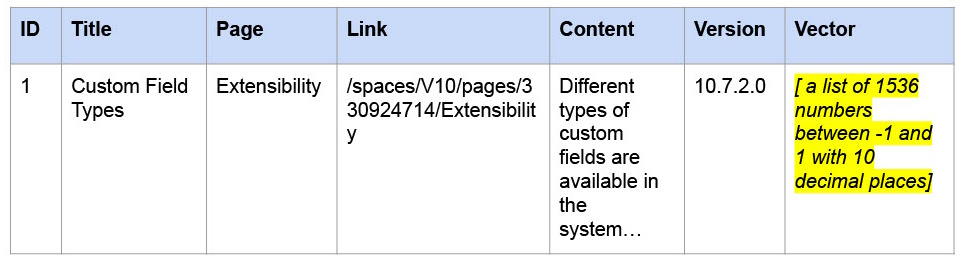
With your vectors ready to go, it’s time to insert them into your vector database. We won’t be just dumping the vectors into a table however; this is an opportunity for you to think about potential context filters you can add to improve the accuracy of your search. For example, if you’re embedding help documentation for a software suite, you may want to include what screen(s), versions, roles, permissions, etc. are associated with each text chunk. That way when you’re performing a vector search in the future, you can further constrain the search to entries you know will be relevant to the user’s current screen / software version / role / etc. This is also an opportunity to constrain content by permissions - you may not want a base user to see the same content a subscription user has access to, or a user with a finance role to see the help documentation for a systems admin.
Of course, in addition to these separate columns of contextual data, you can also insert the actual text snippet that generated the vector. There’s likely ways to go back from an embedded vector to the text that was used to create it, but that’d be a lot more computationally expensive, so it’s easier to just be able to query and return it from the database.
Performing a search
Once you’ve got all that data inserted into your vector database, it’s time to finally use it! You’ll want to create a simple user interface that allows someone to ask a question. In the past I’ve used both a simple websocket-backed web UI chat dialog, and have also integrated with Slack to provide an event-driven chat bot. In either case you end up with a question that the end user asked.
Once you have that sentence, you’ll want to vectorize it. You can use the same process you used to create your content embeddings, ending up with a vector. The vector gets passed into your vector database query, along with any contextual filters you may want to apply; include what screen they’re on, what version they’re on, what role they have, etc. to limit the number of results you want to be returned from your vector database (and, by extension, the computational complexity of the search required).
How you perform this query will be based on the vector database and/or hosted solution you’re using. AWS’s hosted knowledgebases require a specific RetrieveRequest object, whereas calls directly against OpenSearch expect an HTTP POST with a specific body. In any case, you’ll end up with a number of results, along with their “scores”. The score is a representation of how close that entry’s vector is to the provided search vector, usually represented as a percentage. Different vector databases will use different algorithms to determine this score (or provide you with the choice of which to use), but at the end of the day you’ll have a representation of how close that snippet matches to what the user searched for.
At this point you can decide if you want to use the returned snippet of content in your subsequent language model query. Something with a low sub-50% score may just be noise that happened to sound similar to the original question but wouldn’t actually contribute anything to the answer. Including it in the prompt below may cause the language model to hallucinate! It will be up to you to experiment with and tweak any filter you put in place here.
Providing an answer
Once you’ve got your snippets selected through vector search it’s time to generate a response to the end user! Using some prompt engineering and templating you can pass all that data to a language model and return the end result to the user. An example prompt template might look like:
Articles:
{ articles }

Use the above information to answer the following question: { question }
There’s a few other things to consider here:
- If your vector search doesn’t actually return any articles, you may not have supporting documentation that can be used to answer the user’s question. You can decide what to do here - ask the language model to answer it despite not having any backing documentation, or return a generic “sorry, I can’t help you” reply to the user.
- You’ll likely want to experiment with guardrails here. Engineering the prompt so that your software only answers questions pertaining to the subject matter, and ensuring that your language model can’t reply with certain topics (like offering discounts on flights). Red-teaming (trying to break your bot on purpose) and experimentation are recommended here to try to script your bot out of giving invalid replies.
- Remember to log your questions and replies! One of the things a system like this is great for is identifying gaps in your documentation; if your bot wasn’t able to answer a question, make sure to record that so you can flag it as an issue with your documentation team later. Also incorporating some sort of feedback mechanism to allow users to share if a bot’s reply is good or not will help you make adjustments in the future and identify hallucinations.