
Network-driven Xmas Lights
One of the things I’ve always wanted for our house is fancy christmas lights. Nothing like the complicated sound-driven displays that draw crowds of cars to sit and idle in front of your yard for 15 minutes at a time blocking the street, but something simple where I can control the color, pattern, maybe some animation. I’m happy to report I figured out how to make it work!
“Addressable” LEDs have been a thing for awhile, the idea being that you could have a strip of LEDs connected in sequence and programatically reference a specific light within the strip. Given an array of 10 LEDs, I can write code (which subsequently sends the appropriate signals through a pin on a microcontroller) that says “change the 7th LED to Red”. This is how most of the retail packages work - a strip of addressable LEDs plugged into a purpose-built microcontroller that usually has a remote with color and/or pattern buttons on it. Even existing indoor christmas lights, where you can press a button to change the colors or transitions, likely follow a similar system.
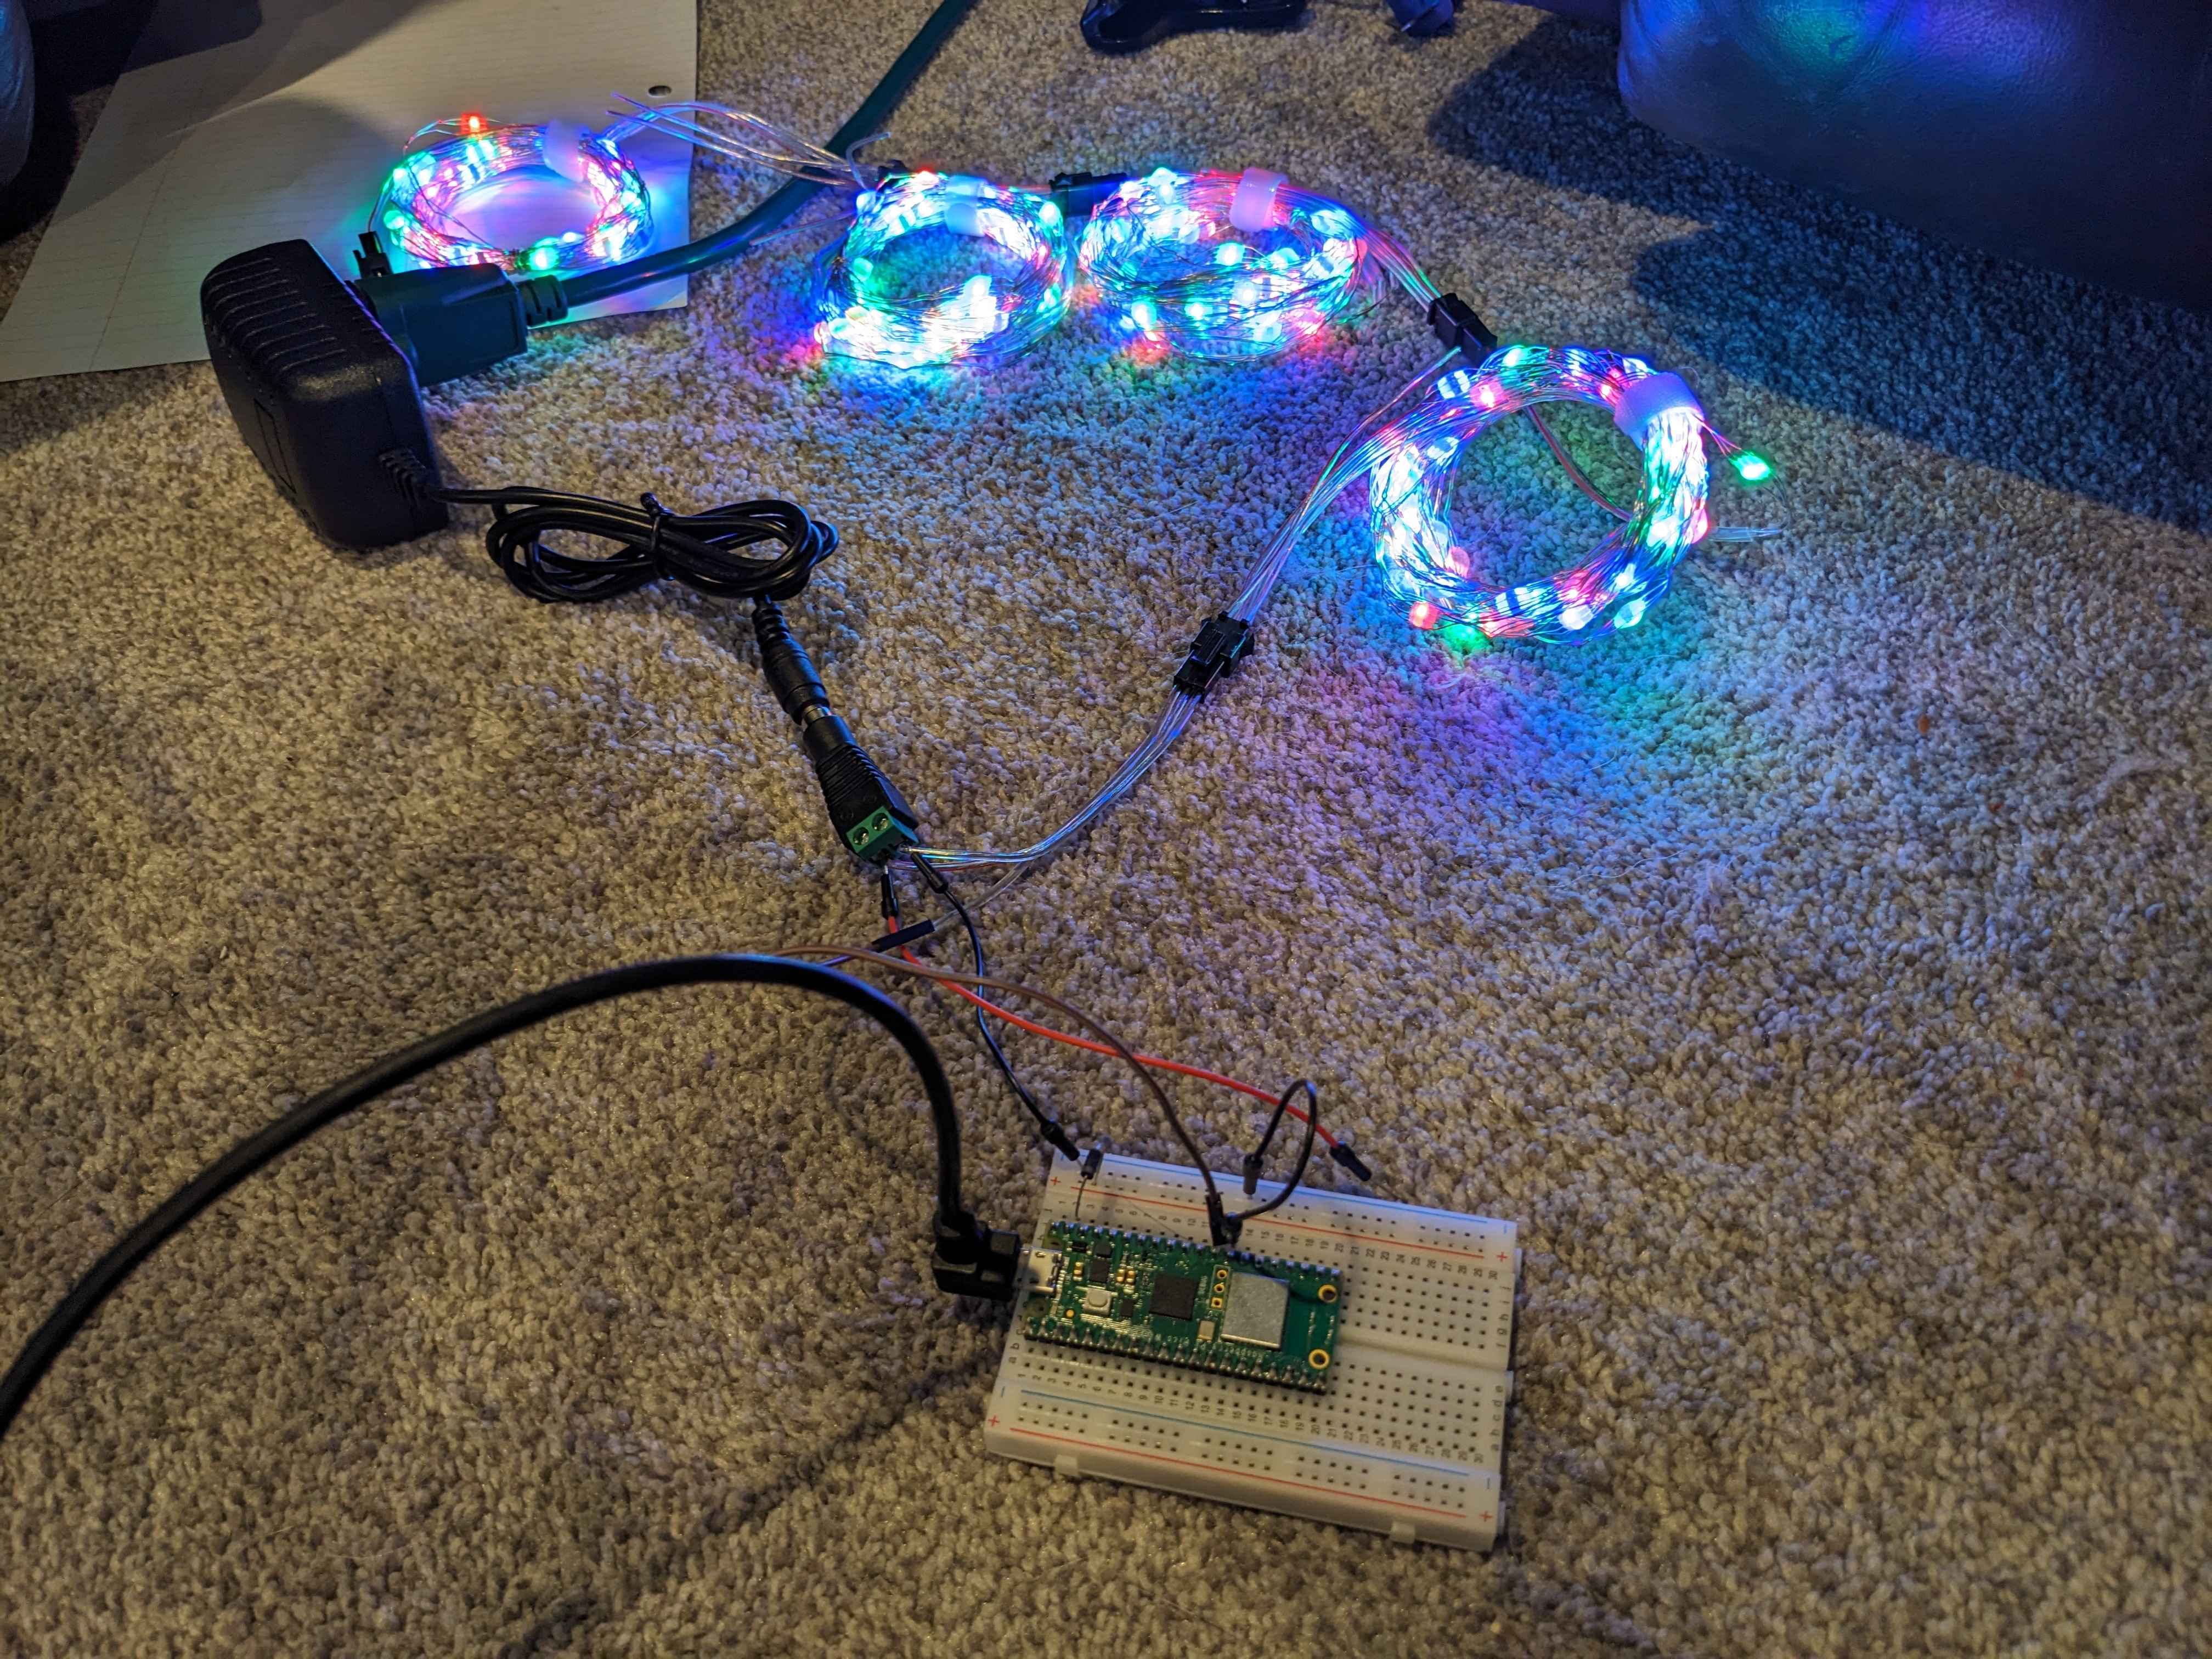
These strips are easily available on Amazon, and that’s where I got some supplies to play around with, starting first with this string of fairy lights, along with a 5V wall plug I could use to power the lights. I also already had a Raspberry Pi Pico W (the W stands for Wifi :) ) from a previous project that I repurposed, but those are also easily found online. With those components in place, I started the project.
After some googling I found an example micropython file I could start with. There were a few other examples from Adafruit and FastLED that used libraries that you needed to import, but I preferred the Core Electronics AU example because it was all in one file and was pretty explicit about how it worked. I uploaded that script to my micropython controller, wired up the lights to the pins using a breadboard, and it worked!
I then began to think on a file format for the light configuration. The idea was to host the file somewhere that the Pico can download it from to determine how to set the colors on the lights. The key is to keep the file format as small as possible to avoid taking up too much memory on the microcontroller, but at the same time providing flexibility. I settled on a format similar to this (although it may change as I add features):
S500(255,0,0)(0,255,0)(0,0,255)
S500(0,255,0)(0,0,255)(255,0,0)
S500(0,0,255)(255,0,0)(0,255,0)
The basic format is:
S- a character that represents a function. For now I just have S for Solid, but in the future I’d like to add Blink, Fade, and other effects500- the number of milliseconds to spend on this line of lights(R,G,B)- a list of RGB colors to fill the string with
Using this, I can configure some animations and basically any color I’d like. The example above would rotate each LED between Red, Green, and Blue twice a second. I also just specify the “pattern block” and have that repeat down the length of the string, making it so I only have to specify a handful of colors.
Now that I had an idea of a file format, it was time to tweak the code. Here’s a breakdown of where I ended up.
from lights import *
I moved most of the original Core Electronics AU example file to a separate file called lights.py, and import those methods to my main.py script. This moved all the controller communication setup, along with the methods to send the light commands to the strip, to a different location separate from my “business logic”
import network
import time

wlan = network.WLAN(network.STA_IF)
wlan.active(True)
wlan.connect("SSID", "PASSWORD")
while not wlan.isconnected() and wlan.status() >= 0:
    time.sleep(1)
Next is hooking up to the wifi so we can download a file. Code identical to the poetry clock.
import urequests
fileReq = urequests.get("https://raw.githubusercontent.com/ChadEmm/pi-lights/main/lights.txt")
data = fileReq.text

rows = data.split()
Downloading the text file that has that format specified above so we can parse it, immediately breaking each line into an array of strings.
while(True):
    for row in rows:
        function = row[0:1]
        color_index = row.index('(')
        seconds = int(row[1:color_index]) / 1000.0
        colors = row[color_index:]
        d = ')'
        parsed_colors = [e+d for e in colors.split(d) if e]
For each row in the array of rows from the file, parse out the relevant sections. The first character will always be a single char function (i.e. S), then we take the characters from position 1 until the first ( and read those in as an integer, representing the milliseconds we spend on this row. Then, we chunk the rest of the string, splitting it by the closing bracket ), and re-appending the closing bracket. After this we end up with a list of strings, each entry in the list representing the RGB tuple for an individual color.
        color_array = []
        for color in parsed_colors:
            tup = eval(color)
            color_array.append(tup)
Here we’re taking each string in our parsed_colors and creating a tuple object out of it using python’s eval method. I really hate using eval for things as it’s prone to all sorts of security flaws, but this is a personal side project :P We append those tuples to an array, which we’ll be using to color our individual LEDs
        for i in range(NUM_LEDS):
            color = color_array[i%len(color_array)]
            pixels_set(i, color)
        pixels_show()
        time.sleep(seconds)
Once we have our list of tuples, we rely on the methods from our lights.py file to set individual LEDs on the string based on the colors in our array, looping through it using a mod operator until we hit the end of the string (represented by NUM_LEDS). The lights.py file uses a similar concept to our eink display, keeping an in-memory “buffer” of the values that will eventually be sent to each LED on the string, which it finally writes using a pin on the Raspberry Pi Pico via the pixels_show() method. Finally, we wait using time.sleep the number of milliseconds specified on this row from the lights.txt file.
I’ve been able to get this script working successfully on up to 200 LEDs! This alone is pretty powerful and makes it easy to do animations, but I’m excited to add more features like fades and blinking. I also need to build out some of the basic functionality; right now it only downloads the file once, I’d have to restart the microcontroller if I wanted to apply any changes. Some obvious refactoring to do as well (i.e. why parse the string every time? Do it once on file read and use in-memory objects to fill the lights!)
I also learned a few things about electrical engineering, particularly how to use a breadboard properly as well as about something called a “Schottky diode”. I wanted to run the Raspberry Pi Pico from the same 5V power supply the lights were using, so I had to do some googling. Apparently the diode makes it so that if you have the external power supply hooked up, but also have a USB connection to a PC (which usually powers the device), it prevents the power from the USB cable from flowing back into the power adapter.
The lights I’m using to try things out also aren’t particularly suited for outdoor use, so I’ll have to buy a different strand that’s more waterproof, but the good thing is that shouldn’t require any code changes (other than if there’s more or less LEDs in the total length).
I’m also hoping to make a simple responsive web app that serves as a front end for creating the color file, so that my wife doesn’t have to ask me to manually type something out when she wants a change :) That’ll be the next project!